Creating an Account
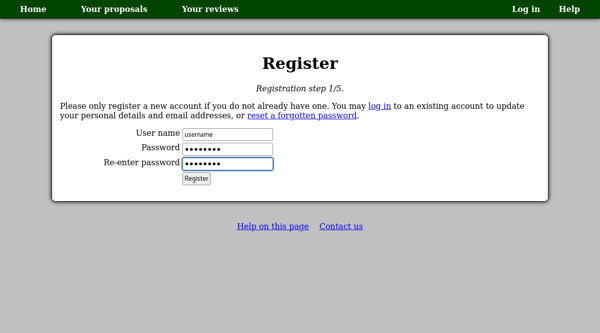
Before you can begin writing a proposal, you will need to create an account. Click the “Log in” link at the top right and then click the “register” link.

You should now see the new-user registration page. Enter the user name which you would like to use to log in to the system and a password.
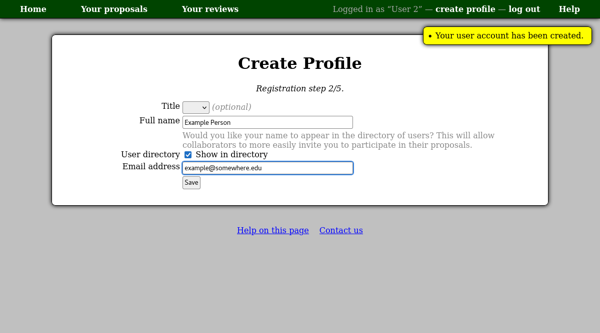
On the next page, notice the yellow box at the top right. When this box appears it will indicate an action which has been performed. In this case it confirms that your user name and password have been set up.
This page allows you to configure your profile — this is your personal information which will be attached to any proposal of which you are a member. You have the option of being shown in the user directory or not. If you choose to show your profile in the directory, it will allow your collaborators to automatically give you access to proposals which they create. Otherwise you will be sent an invitation code by email if anyone wants to add you as a member of a proposal.
By default, your email address is not shown on your profile, even if your profile is shown in the user directory. You can configure these settings at any time from your profile page.
Please note that you will not be able to use the password reset system to recover a lost password until you have entered an email address. Please contact us if you lose your password at this stage as we may be able to help you recover your account. We may also remove accounts left in this state if they are inactive for a long time.
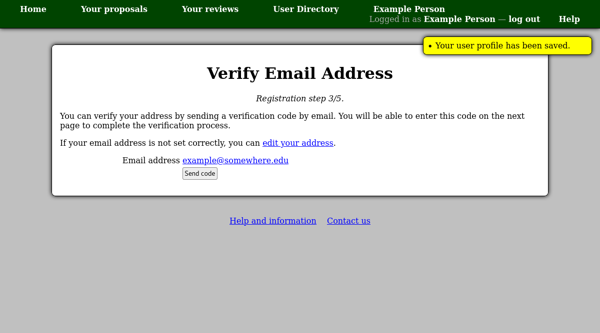
The system will then send a message including a verification code to your email address. Click the “Send code” button to begin this process.
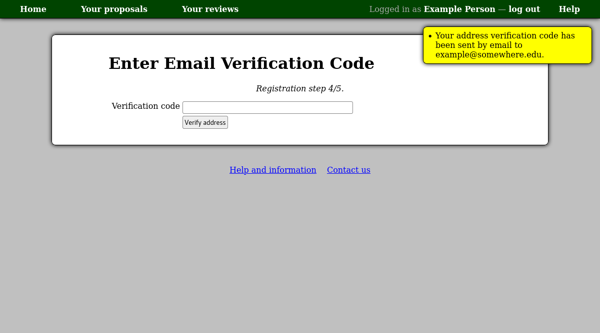
When you receive the code, you can copy and paste it into the box on the following page.
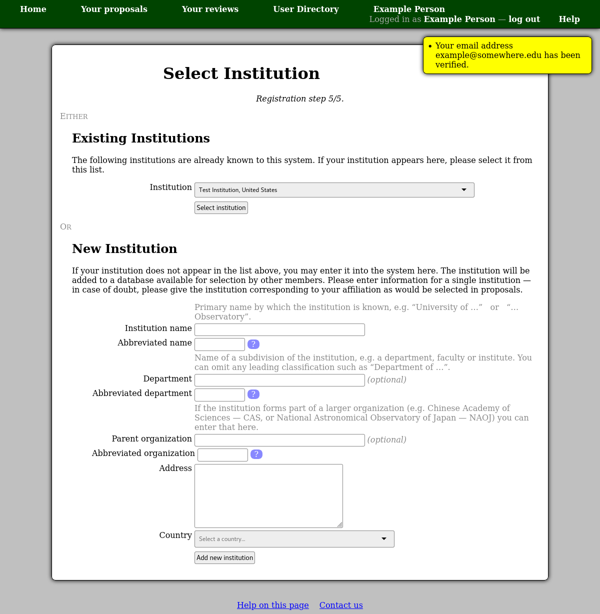
Finally you should select the institution with which you are affiliated. Please check the menu of institutions which are already known to the system. If your institution appears here, please select it, and press the “Select institution” button.
If your institution does not appear, you may enter the institution’s details in the “New Institution” section of the page and press the “Add new institution” button. The “Institution name” should be the main name by which you refer to the institution. This is often the name of the university (e.g. University of Exeter) or observatory (e.g. Purple Mountain Observatory) but is sometimes the name of a specific institute (e.g. Harvard-Smithsonian Center for Astrophysics) when it is often used alone. The department and parent organization are optional. Please be sure to select the correct country from the list.
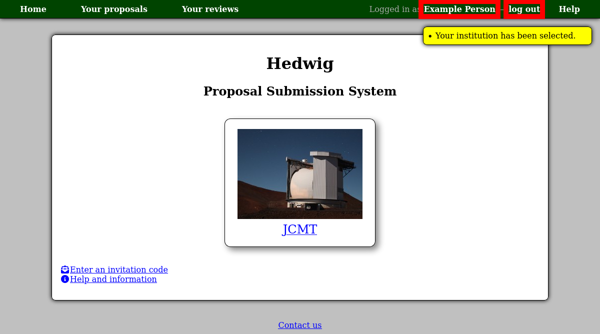
This completes the registration process. You should be taken back to the home page.
Note your name and the “log out” link at the top right of the page. This serves as a reminder that you are logged in. Don’t forget to log out when you are done using this system if someone else may have access to your computer. Your session will automatically time out after twelve hours of inactivity — you will be prompted to log in again in this case.
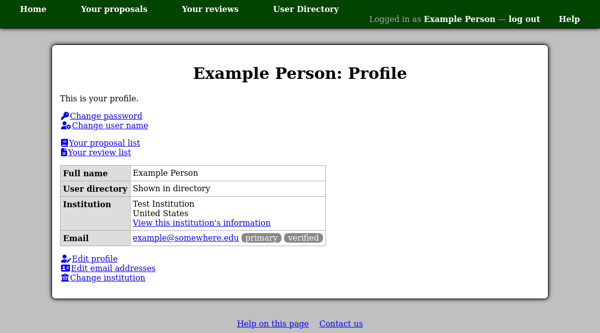
The link showing your name will take you to your profile page. You may use this page at any time to manage your account, for example you can:
- Change your user name or password.
- Add, change or remove email addresses.
- Change your institution.
Note that you can configure multiple email addresses and designate one of them as your primary address. Messages sent by the system will generally be sent to your primary address.
As we have already seen, this system maintains a shared list of institutions which people can select for their profile. Please be aware of the different ways you can change your institution:
- If you have moved to a different institution, please click the “Change institution” link on your profile. This will allow you to select another institution or enter its details.
- If something is wrong with your current institution (perhaps the address has changed or the name is spelled incorrectly) then you can click the institution’s name on your profile and then click “Edit this institution”. This will update the institution record for everyone using it.
For more information about your profile, please see the profile page in the account management section of this documentation.